You are here: Home » Blog » Product News » Comprehensive Installation Guide for Raised Access Floors
Comprehensive Installation Guide for Raised Access Floors
Views: 20 Author: Site Editor Publish Time: 2025-11-27 Origin: Site
Raised access floors, with the advantages of conveniently accommodating pipelines and adapting to equipment wiring, are widely used in computer rooms, office buildings, data centers, and other scenarios. Their installation quality directly affects operational safety and durability. Below is a complete installation guide covering pre-installation preparation, installation implementation, inspection and acceptance, and post-installation maintenance.
I. Pre-Installation Floor Preparation Requirements
Before installation, ensure the floor meets the basic conditions to lay a stable foundation for subsequent construction:
Sequence of Floor Pre-Treatment: Complete floor decoration and edge trimming first to avoid damaging the decorative layer or floor edges during subsequent floor installation;
Basic Condition of the Floor: The floor must be level, clean, and dry, free from dust, debris, oil stains, and other impurities. An uneven floor may cause uneven stress on pedestals, while residual impurities can affect floor adhesion;
Pre-Construction of Underfloor Equipment: Equipment such as cables, wires, drainpipes, and ventilation ducts under the floor must be installed in advance to avoid secondary disassembly after floor installation;
Pedestal Treatment for Heavy-Duty Equipment: Separate pedestals must be installed for large or extra-heavy equipment (e.g., server racks, large machine tools), and the top of the pedestals must be flush with the floor decorative layer to prevent direct pressure from the equipment causing floor deformation.
II. List of Essential Installation Tools
Prepare appropriate tools in advance to improve installation efficiency and accuracy. The specific tools and their uses are as follows:
Tool Name
Core Purpose
Cutting Equipment
Cutting panels to fit irregular spaces around walls and equipment
Laser Level
Detecting floor flatness and wall verticality, calibrating elevation lines
Panel Lifter
Lifting and moving panels stably to avoid collision damage caused by manual handling
Wrench
Tightening connecting bolts for components such as pedestals and stringers
Philips Screwdriver
Securing connecting components between panels, pedestals, and stringers
III. Step-by-Step Installation Process
1. Pre-Installation Measurement and Marking
First, use a laser level to confirm the overall flatness of the floor (the error must be within the specified range) and the verticality of the walls. If there is a deviation, level the floor or correct the walls first;
Mark the finished floor elevation line along the walls to ensure consistent elevation throughout the room (calibration can be done by projecting a reference line with a laser level);
Measure the length and width of the floor, and draw grid lines according to the panel size (e.g., 600mm×600mm panels correspond to grid lines with 600mm spacing). Mark the installation positions of pedestals at the grid intersections—this step accurately positions the pedestals and avoids dimensional errors when cutting panels later.
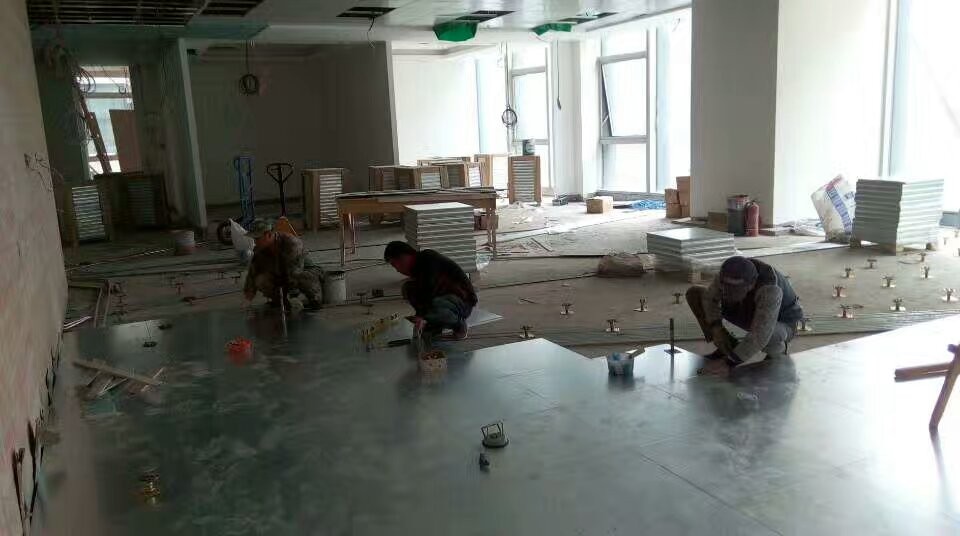
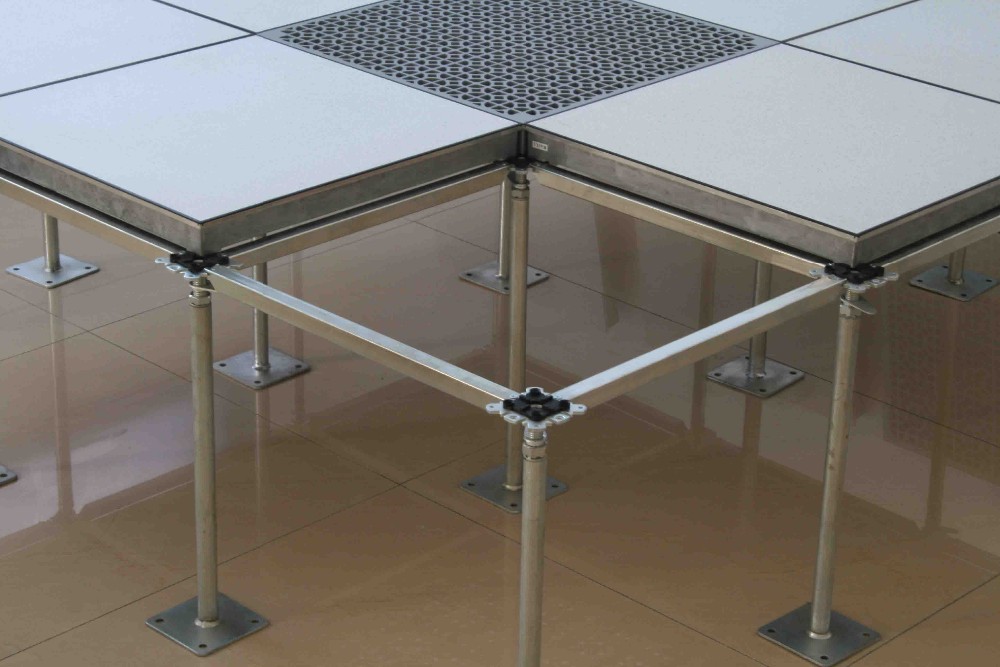
2. Installation of Pedestals and Auxiliary Components
Place pedestals one by one at the grid intersections, adjust all pedestals to the same height using the pedestal adjustment device (based on the elevation line), and firmly fix the pedestals to the floor with expansion bolts or fasteners after confirming consistent height;
If the design requires the installation of hangers (e.g., for auxiliary fixing of pipelines or supporting light components), accurately install the hangers on the corresponding bases after fixing the pedestals.
3. Panel Installation and Adjustment
Use a panel lifter to place panels stably on the longitudinal beams (or stringers), prioritizing the installation of entire panel areas before handling edge irregular areas;
For gaps around walls or equipment, cut the panels with cutting equipment. Ensure the gap between the cut panel and the wall/equipment is smaller than the size of a single panel (usually 5-10mm, subject to design requirements), and polish the cut surface smoothly before fitting it tightly against the wall;
Continuously use a laser level to detect the panel height during installation. If there is a height difference, adjust the pedestal height to keep the entire floor at the same horizontal level;
If heavy equipment needs to be placed on the floor, install additional pedestals under the floor in the area corresponding to the equipment to enhance load-bearing capacity (the spacing of additional pedestals must be calculated based on the equipment weight to ensure even force distribution).
4. Accurate Fixing of Panels
After leveling and fixing the stringers and pedestals, use a panel lifter again to accurately embed the panels between the stringers, ensuring the bottom of the panels is fully attached to the top of the pedestals; during installation, strictly align with the grid lines and adopt the method of "step-by-step installation and block-by-block calibration" to avoid panel misalignment or excessive gaps (the joint gap between a single panel and adjacent panels must be ≤2mm).
5. Finishing of Peripheral Areas
Panels at the edges of walls or floors must be cut a second time according to the actual space size to ensure the edge panels are smoothly connected to the walls and other panels without protrusions or depressions;
If there are gaps between the walls and the floor, or if the transition areas are prone to collision (e.g., corridors, equipment entrances), install decorative edging strips (e.g., aluminum alloy edging strips) or anti-collision strips to improve aesthetics and durability;
After installation, check the stability of all edge panels—no wobble or displacement when gently pushing the panels indicates qualification.
6. Post-Installation Cleaning
Remove dust, cutting debris, packaging materials, and other impurities from the floor surface to avoid panel wear caused by residual impurities;
Use a soft brush or dust cloth for cleaning. Never use abrasive cleaners (e.g., steel wool, abrasive cleaners) or water-based cleaning products—especially when the floor is not sealed or covered (e.g., with carpet or epoxy resin), water-based products may penetrate the panels and cause deformation.
IV. Inspection and Acceptance Standards
After installation, conduct acceptance checks according to the following standards to ensure the floor meets operational requirements:
Cleanliness Requirement: The surface of the raised access floor and the floor below must be free from dust, debris, oil stains, and other impurities, and no residual impurities on the surface of pipelines;
Appearance Requirement: The floor surface must be free from scratches, dents, damage, coating peeling, and other defects, and the panel joints must be uniform and flat;
Stability Requirement: When personnel walk on the floor, there must be no obvious wobble of the panels and no displacement at the joints; use a level to detect the entire floor, and the height difference must be ≤3mm (the specific error range can refer to the project design standards).
V. Usage and Maintenance Specifications
To extend the service life of the floor, the following usage and maintenance requirements must be followed:
Environmental Requirements: The operating environment temperature must be controlled at 15-35°C, and the relative humidity at 45-75%RH. Excessively high or low temperature and humidity may cause panel expansion, contraction, or deformation;
Panel Protection: Do not directly use sharp tools (e.g., blades, screwdriver tips) to scratch the panels. Lay protective plates in the operation area to prevent panel scratches or coating peeling;
Equipment Movement Requirements: Do not drag or move equipment directly on the floor surface to avoid panel wear caused by friction; use a cart with rubber wheels to transport equipment, or lay a rubber pad under the equipment;
Heavy-Duty Equipment Operation: When moving heavy-duty equipment, first use a panel lifter to lift the panels in the corresponding area before positioning the equipment to reduce direct pressure on the panels;
Daily Cleaning: Regularly clean the floor with a clean soft brush or dust cloth. For deep cleaning, use a neutral cleaner (test compatibility in a hidden area in advance) and avoid using abrasive or corrosive cleaners.
Ⅵ. Conclusion
By following the steps above, you can ensure the installation quality and performance of raised access flooring. Proper installation and maintenance not only enhance the aesthetic appeal of the space but also safeguard equipment safety and personnel efficiency. If you require further technical support, we recommend consulting a professional construction team.
 English
 العربية
 Français
 Русский
 Español
 Português
 Deutsch
 italiano
 日本語
日本語 한국어
한국어 Nederlands
 Tiếng Việt
 ไทย
ไทย Polski
 Türkçe
 Bahasa Melayu
 Filipino
 Bahasa Indonesia
 magyar
 Română
 Čeština
 қазақ
қазақ Српски
 हिन्दी
 فارسی
فارسی Slovenčina
 Slovenščina
 Norsk
Norsk Svenska
 українська
 Ελληνικά
 Suomi
Suomi Հայերեն
 עברית
עברית Dansk
Dansk Shqip
Shqip বাংলা
বাংলা Hrvatski
 Afrikaans
 Gaeilge
 Eesti keel
 नेपाली
 Oʻzbekcha
 latviešu
 Azərbaycan dili
 Euskara
 Български
 Català
 ქართული
 Hausa
Hausa Lietuvių