Installing a raised floor can transform any space, offering flexibility, improved cable management, and enhanced airflow. Whether you're outfitting a new office or upgrading a data center, understanding the intricacies of raised floor installation is crucial. This guide will walk you through the benefits, types, components, and installation process of raised floors, ensuring you achieve a professional and functional guidance.
What is a Raised Floor?
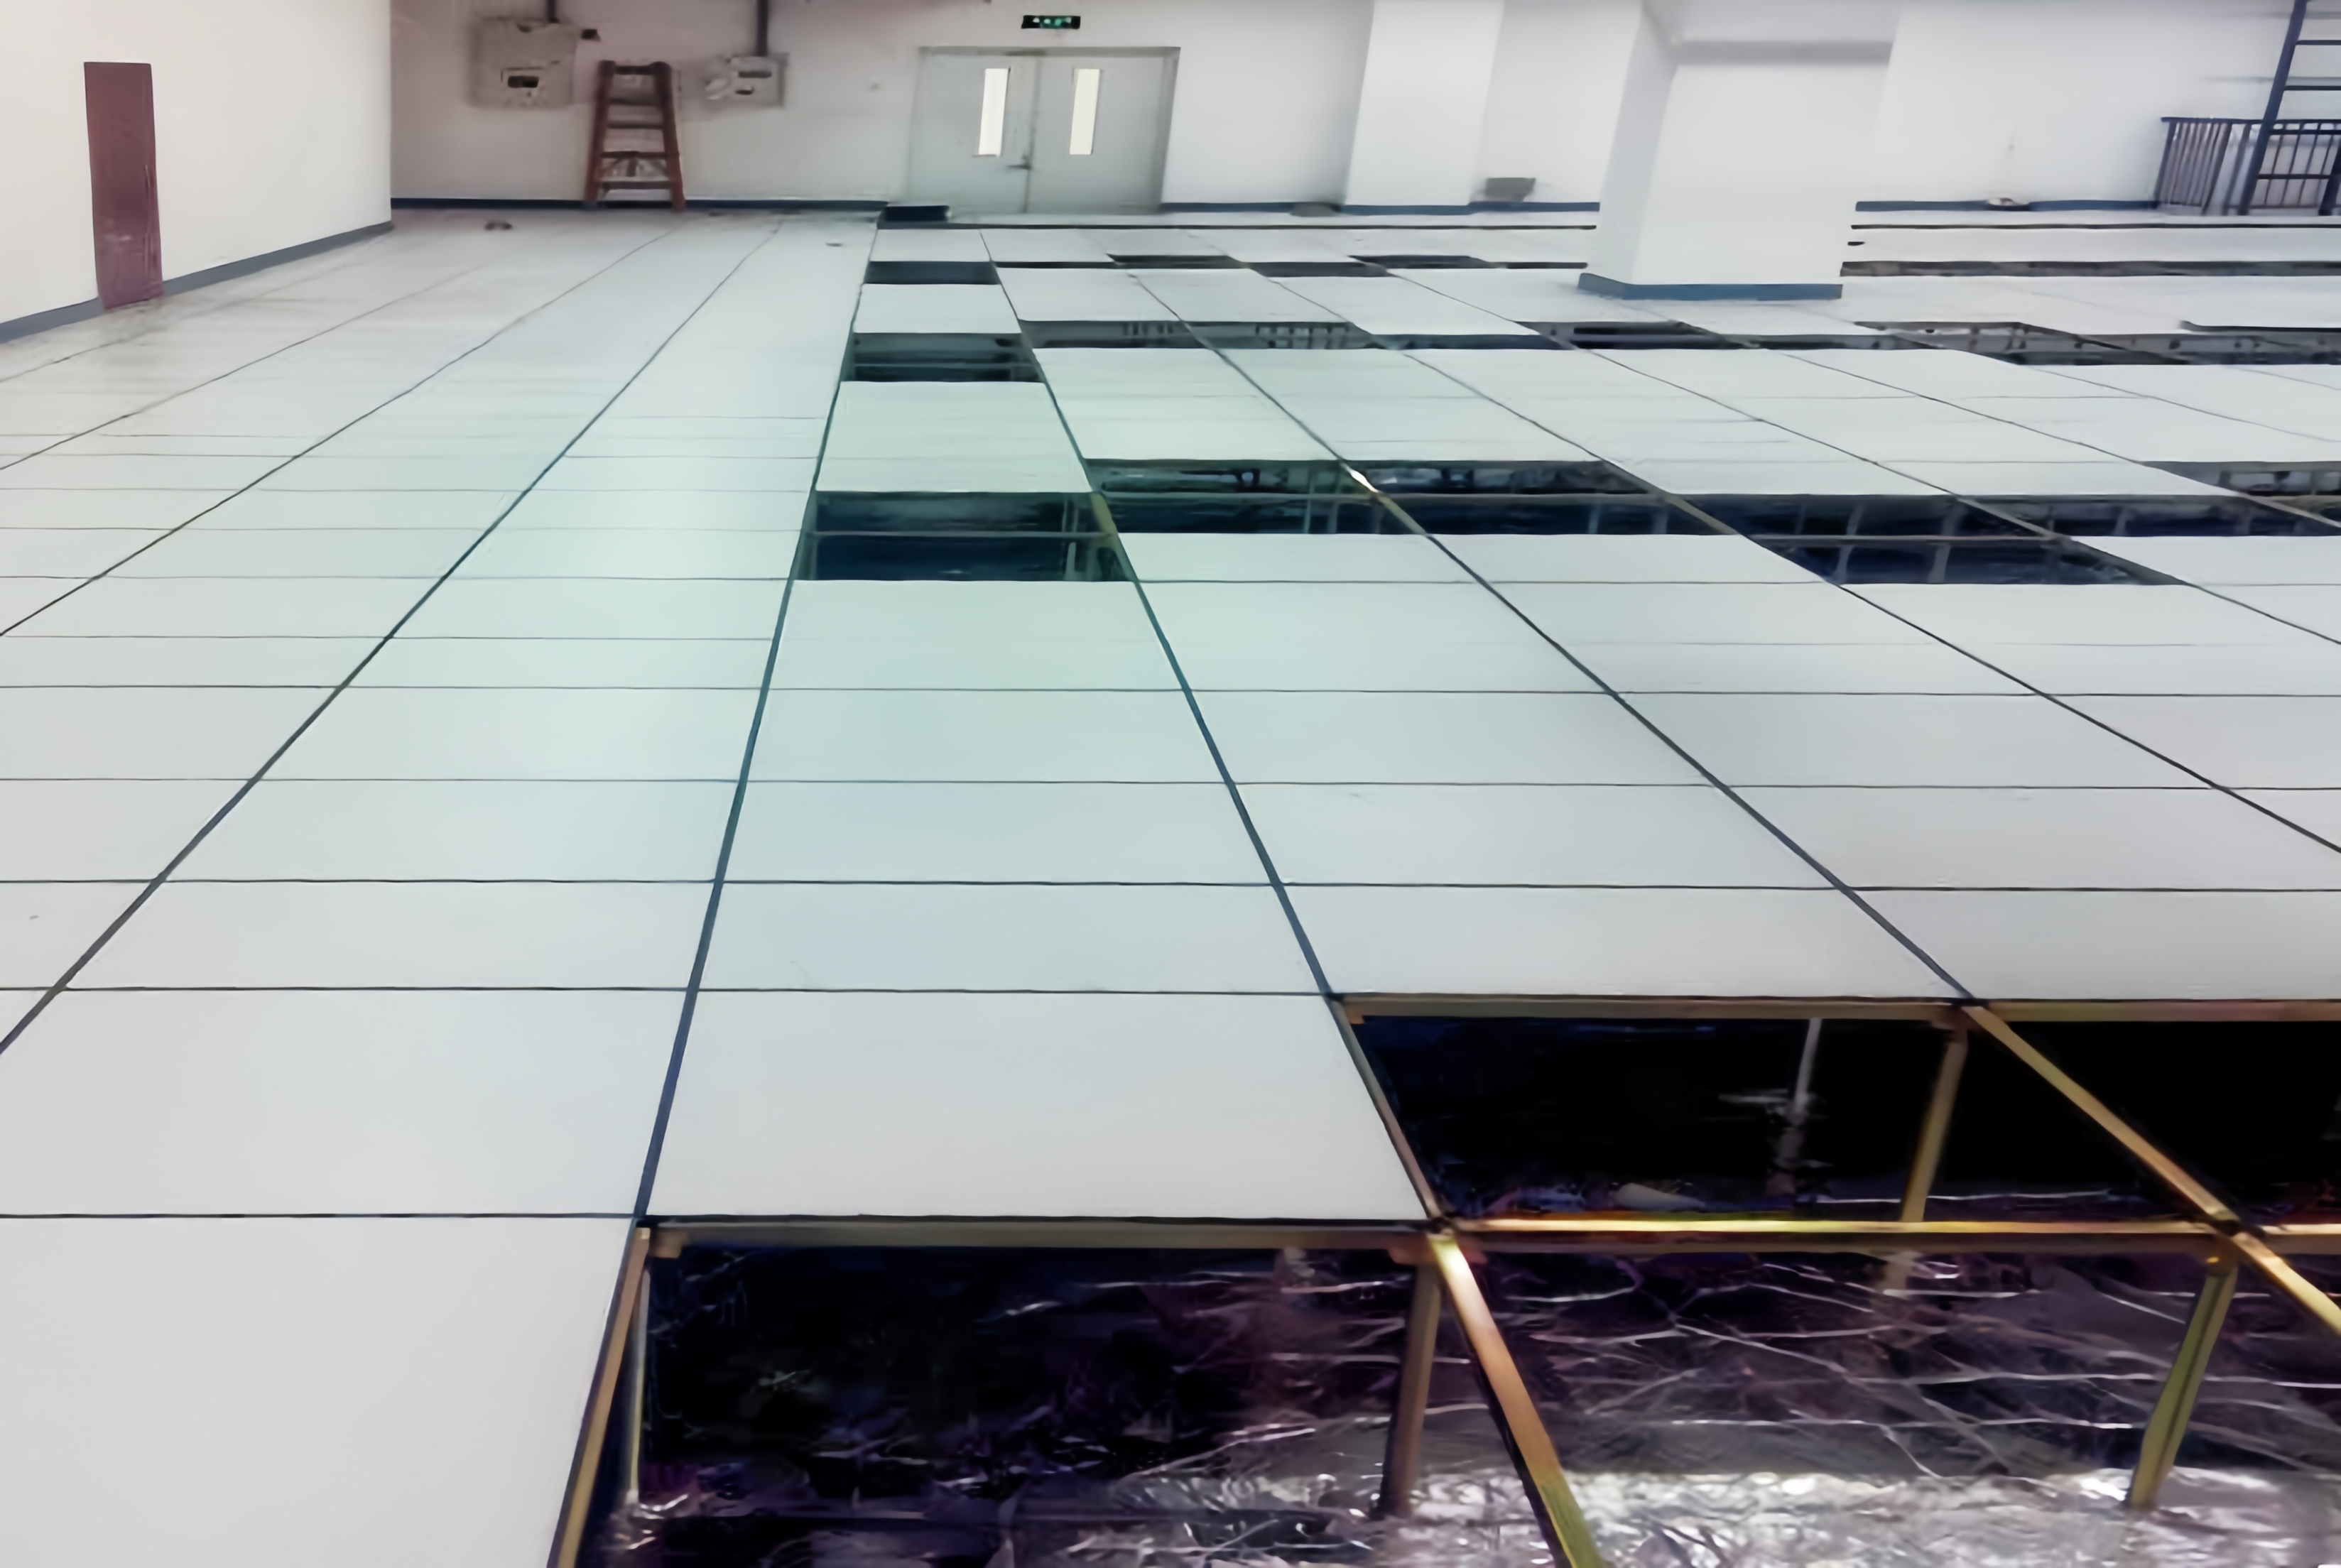
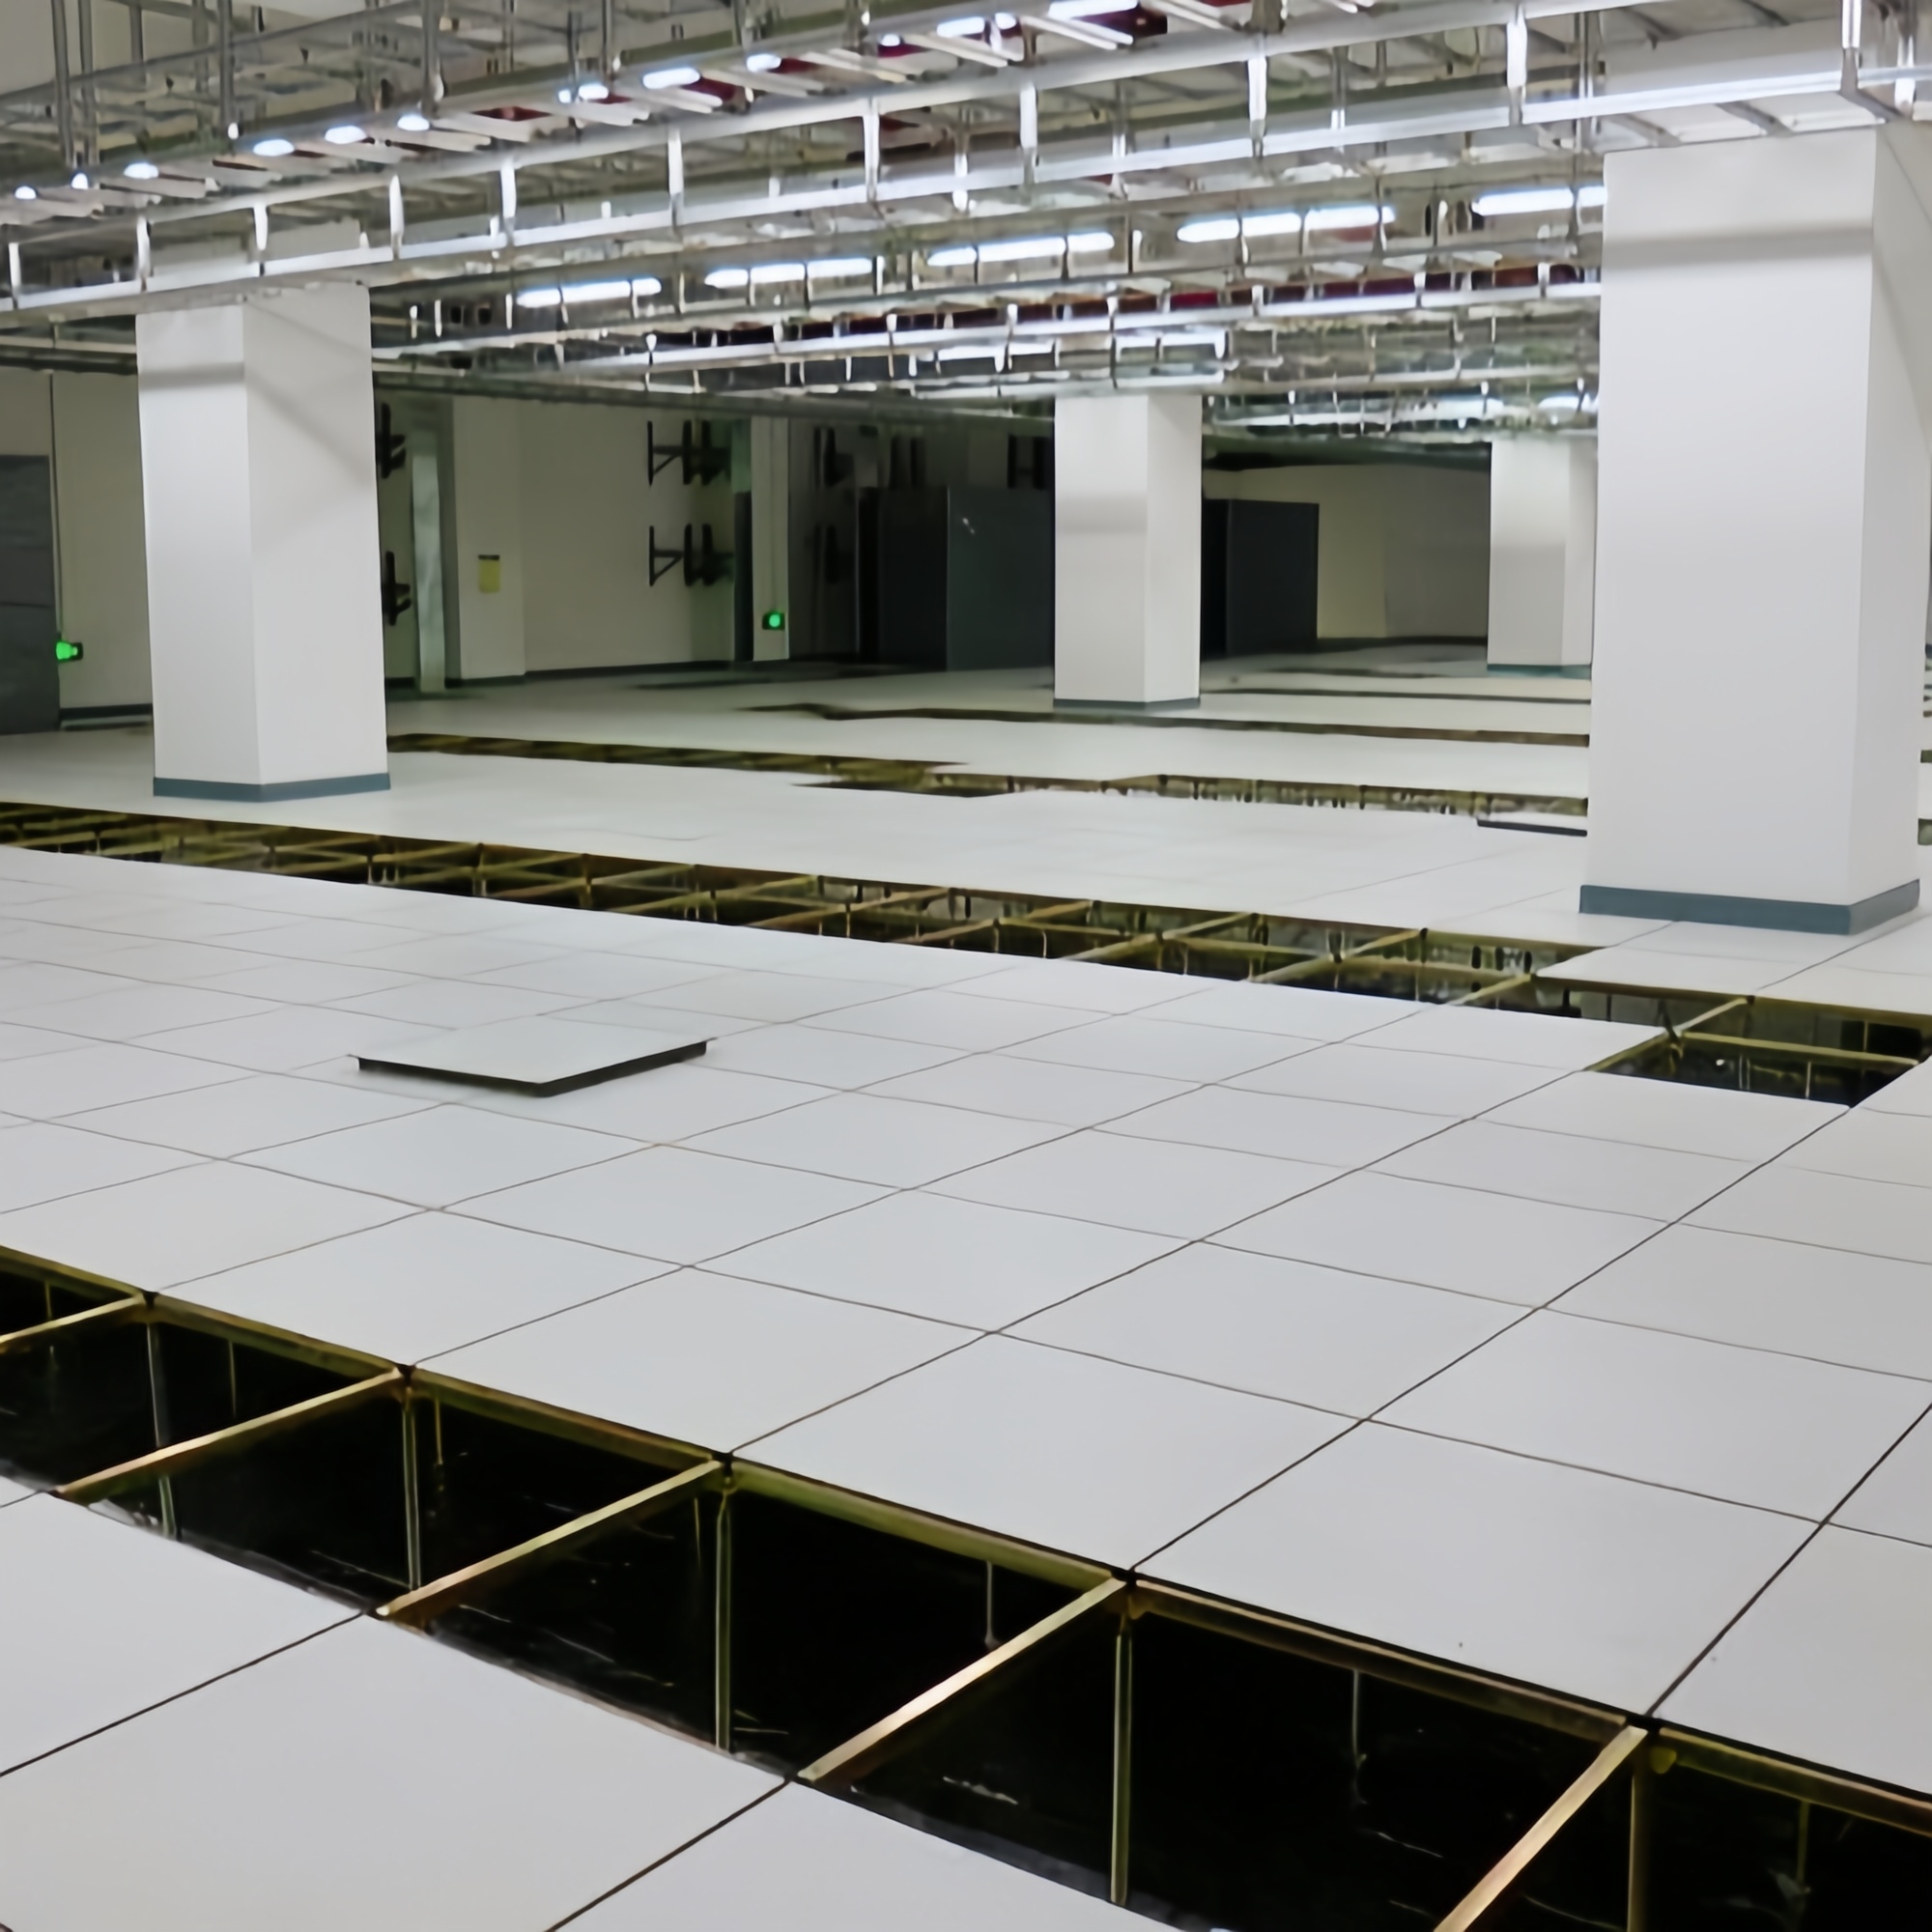
A raised floor, also known as an access floor, is a flooring system installed above the building's original concrete slab. It creates a hidden void for the passage of mechanical and electrical services. These floors are commonly used in office buildings, data centers, and command centers where there is a need for extensive cable management and climate control.
If you want to leran more about raised floor suppliers, Top 15 Worldwide Raised Floor Supplier suits you.
Benefits of a Raised Floor
1. Improved Airflow:
One of the primary benefits of a raised floor is improved airflow. The space beneath the floor can be used to distribute conditioned air throughout the room, which is particularly beneficial in data centers where temperature control is critical.
2. Enhanced Cable Management:
Raised floors allow for superior cable management. Cables can be routed beneath the floor, reducing clutter and making it easier to manage and reconfigure systems as needed. This is particularly advantageous in environments with significant IT infrastructure.
3. Flexibility and Adaptability:
Raised floors offer a high degree of flexibility and adaptability. As the needs of a space change, the floor panels can be easily lifted to access and reconfigure the underlying services. This adaptability is valuable in dynamic work environments that frequently undergo changes.
Types of Raised Floors
1. Access Floor Panels
Access floor panels are the most common type of raised floor. These panels are typically made from steel, aluminum, or composite materials and are designed to be easily removed to access the space below.
2. Low-Profile Raised Floors
Low-profile raised floors are designed for spaces where a full raised floor isn't practical. They provide a minimal elevation while still offering the benefits of cable management and airflow. These floors are often used in renovation projects where ceiling heights are a concern.
Components of a Raised Floor System
1. Panels
The panels are the main components that form the walking surface of the raised floor. They come in various materials and finishes to match the aesthetic and functional requirements of the space. Panels have many types, such as Steel Cement Panel, Calcium Sulphate Panel, and Woodcore Panel.
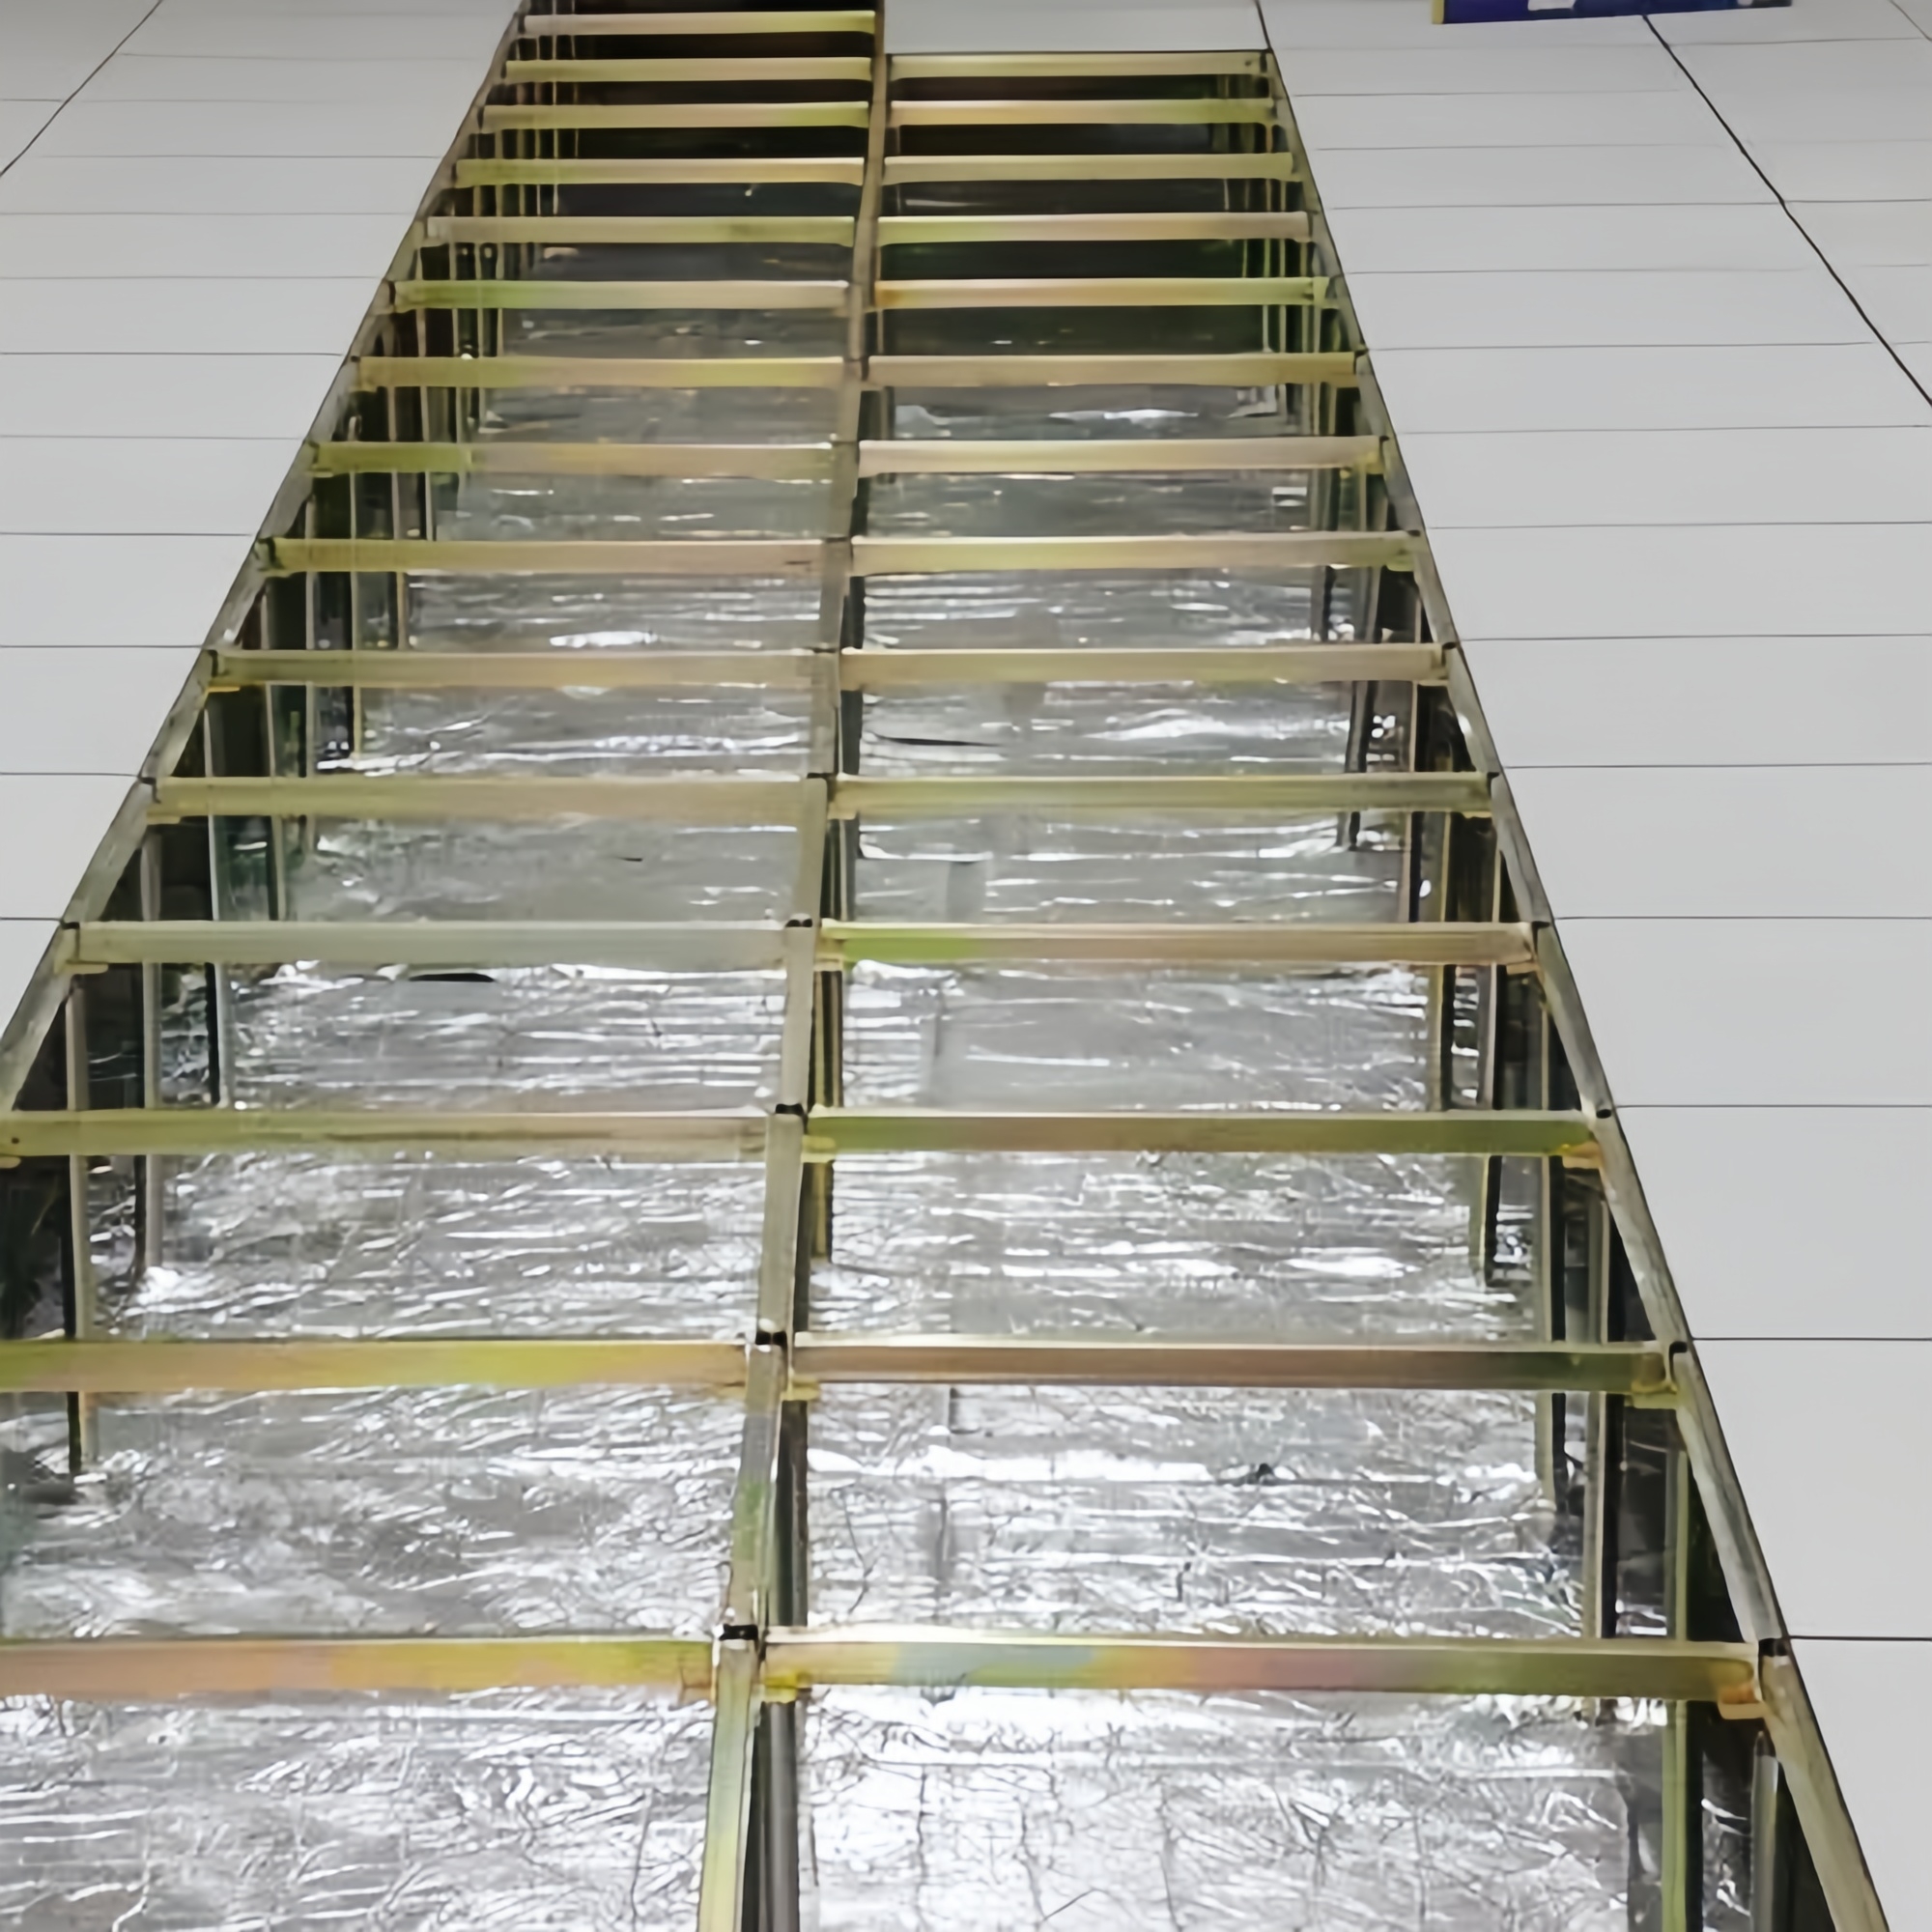
2. Pedestals
Pedestals are the adjustable supports that hold up the floor panels. They are usually made of steel and can be adjusted to various heights to ensure a level surface.
3. Stringers
Stringers are the horizontal supports that connect the pedestals and add stability to the raised floor system. They are crucial in heavy-duty applications where additional strength is required.
Steps to Install a Raised Floor
1. Planning and Design
The first step in installing a raised floor is planning and design. This involves assessing the needs of the space, determining the layout, and selecting the appropriate materials and components. Accurate planning is essential to ensure the installation process goes smoothly. By the way, choosing a professional Raised Floor factory is the first step to successful installation.
2. Site Preparation
Before installation begins, the site must be prepared. This includes cleaning the existing floor, ensuring it is level, and marking out the grid pattern for the pedestals. Cables, electrical pipes and air conditioning systems arranged under the floor should be completed before installing the floor. Proper site preparation is crucial for a successful installation.
3. Tools Preparation
The list of tools shown here is not intended to be all inclusive or limiting for the installer.
| Handbox | Safety items required | Power Tools |
| 1 | 10-foot tape measure (min. length) | Safety glasses | Laser with target designed for access floor installation. |
| 2 | 16-foot steel tape measure | Work gloves | Power drill 3/8” |
| 3 | 20-oz. claw hammer with steel handle | Ear plugs or ear muffs | Power drill 1/2” |
| 4 | Centerpunch | Steel toe safety shoes or boots | Adjustable hammer drill 1/2” |
| 5 | Countersink | Sleeve protectors | Powder actuator |
| 6 | Screwdrivers | Full-face shields | Set of powder actuator pins & shots |
| 7 | 2-foot Hand Level |
| Bayonet saw and bi-metal blades |
| 8 | Pair of pliers/channel locks |
| 10” Electric Miter box saw (optional) |
| 9 | Dry line |
| 14” Metal-cutting bandsaw with cutting speed capability of 450 ft. per minute. |
| 10 | Pop rivet gun |
| Bandsaw and reciprocating saw blades: Bi-metal, 14-tooth, 1/2” wide, .034” thick. This blade will cut: All Steel panels, ConCore panels, Woodcore panels, stringers, pedestal heads and bases, fascia plate and other misc. items. For cutting aluminum, use bi-metal blade with 10 teeth per inch or circular non-ferrous metal cutting saw. |
| 11 | Awl |
| 25” pallet jack |
| 12 | Chalk line and chalk |
| Leveling bar 10 ft. |
| 13 | Drill bit set 1/8” to 1/2” |
| Adjustable torque-limiting screw gun |
| 14 | Putty knife, 3” wide |
| 50-foot extension cords |
| 15 | Pair tin shears (good quality) |
| 100-foot extension cords |
| 16 | Double cup section panel lifter |
| (1 each) 3”, 4” and 5” metal cutting hole saws |
| 17 | Marking pencils |
| Industrial Shop-Vac |
| 18 | Drill bits, 9/64” |
|
|
| 19 | Utility knife |
|
|
| 20 | Rasp and metal files |
|
|
| 21 | Screw gun tip bits |
|
|
4. Installing Pedestals
Once the site is prepared, the pedestals are installed. They are arranged according to the grid pattern and adjusted to the desired height. It is important to ensure that each pedestal is securely fastened and level.
5. Laying the Panels
After the pedestals are in place, the panels are laid on top. This process involves carefully positioning each panel and ensuring it is properly aligned and seated on the pedestals. Any necessary cutouts for cables or other services should be made at this stage.
6. Final Adjustments and Finishing
The final step is to make any necessary adjustments to ensure the floor is level and secure. This may involve tightening connections, adjusting heights, and ensuring all panels fit snugly. Once the floor is complete, any finishing touches such as trim or edging can be added.
Common Mistakes You Need to Avoid
Avoiding common mistakes can save time and money during raised floor installation. Some mistakes to watch out for include improper site preparation, inaccurate measurements, and neglecting to account for future changes in the layout or usage of the space.
Maintenance Tips for Raised Floors
Regular maintenance is key to ensuring the longevity and functionality of a raised floor system. This includes periodic inspections, cleaning beneath the panels, and promptly addressing any damage or wear. Keeping a maintenance schedule can help prevent minor issues from becoming major problems.
Cost Considerations
The cost of installing a raised floor can vary widely depending on factors such as the size of the area, the type of materials used, and the complexity of the installation. It's important to budget for both the initial installation and ongoing maintenance to ensure the system remains functional and effective.
Installing a raised floor is a significant investment that can greatly enhance the functionality and flexibility of a space. By understanding the benefits, types, components, and installation process, you can ensure a successful project. Proper planning, careful execution, and regular maintenance are key to maximizing the benefits of a raised floor system.
FAQs:
Q1: What is the primary purpose of a raised floor?
A1: The primary purpose of a raised floor is to create a hidden space for routing mechanical and electrical services, improving airflow, and enhancing cable management.
Q2: Can a raised floor be installed in an existing building?
A2: Yes, raised floors can be installed in existing buildings, although the installation process may need to be adapted to accommodate the existing structure.
Q3: How much height does a raised floor add?
A3: The height added by a raised floor can vary, but typically ranges from a few inches to several feet, depending on the type of system and the requirements of the space.
Q4: Are raised floors suitable for residential use?
A4: While less common, raised floors can be used in residential settings, particularly in home offices or spaces with significant wiring and cable management needs.
Q5: How often should a raised floor be inspected?
A5: It's recommended to inspect a raised floor at least once a year, with more frequent inspections in high-traffic or critical environments. Regular maintenance helps ensure the system remains functional and safe.
 English
 العربية
 Français
 Русский
 Español
 Português
 Deutsch
 italiano
 日本語
日本語 한국어
한국어 Nederlands
 Tiếng Việt
 ไทย
ไทย Polski
 Türkçe
 Bahasa Melayu
 Filipino
 Bahasa Indonesia
 magyar
 Română
 Čeština
 қазақ
қазақ Српски
 हिन्दी
 فارسی
فارسی Slovenčina
 Slovenščina
 Norsk
Norsk Svenska
 українська
 Ελληνικά
 Suomi
Suomi Հայերեն
 עברית
עברית Dansk
Dansk Shqip
Shqip বাংলা
বাংলা Hrvatski
 Afrikaans
 Gaeilge
 Eesti keel
 नेपाली
 Oʻzbekcha
 latviešu
 Azərbaycan dili
 Euskara
 Български
 Català
 ქართული
 Hausa
Hausa Lietuvių


